
Geotextile Fabric Installation Process: Best DIY Practices
Easy Steps to Install Geotextile Fabric for Your Projects
Key Takeaways
| Aspect | Details |
|---|---|
| Primary Uses | Drainage, erosion control, soil stabilization, landscaping |
| Installation Time | 2-6 hours depending on project size |
| Essential Tools | Shovel, rake, utility knife, measuring tape, stakes |
| Ground Preparation | Level surface, remove debris, compact soil |
| Overlap Requirements | 6-12 inches between fabric pieces |
| Securing Methods | Landscape pins, staples, or weighted edges |
| Common Mistakes | Insufficient overlap, poor ground prep, wrong fabric type |
| Maintenance | Periodic inspection, debris removal, edge reinforcement |
Understanding Geotextile Fabric Applications
Geotextile fabric serves multiple purposes in construction and landscaping projects. You’ll find it most useful for preventing soil erosion, improving drainage, and separating different soil layers. The fabric acts as a barrier that lets water pass through while keeping soil particles in place.
Most homeowners use geotextile fabric under driveways, walkways, and garden beds. It stops weeds from growing through gravel and prevents the mixing of different materials. Professional contractors rely on geotextile mattress systems for larger projects like slope stabilization and waterway protection.
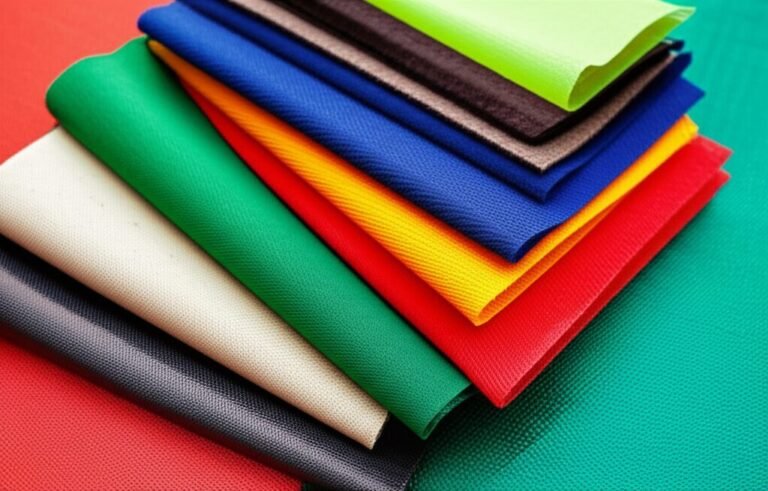
The fabric comes in woven and non-woven varieties. Woven types offer higher strength for heavy-duty applications, while non-woven versions provide better filtration for drainage projects. You need to match the fabric type to your specific project requirements.
Essential Tools and Materials for Installation
Getting the right tools makes installation much easier and faster. You’ll need basic hand tools that most people already have in their garage or shed.
Required Tools:
- Shovel or spade for excavation
- Rake for surface preparation
- Utility knife or scissors for cutting fabric
- Measuring tape for accurate sizing
- Wooden stakes or landscape pins
- Hammer or mallet for securing
Materials Needed:
- Geotextile fabric (10% extra for overlaps)
- Landscape pins or staples
- Sand or fine gravel for leveling
- Marking spray or chalk
Professional installations often use specialized equipment like plate compactors and fabric dispensers. However, smaller residential projects work fine with basic tools. The key is having sharp cutting tools and plenty of pins to secure the fabric properly.
Site Preparation and Ground Assessment
Proper ground preparation determines the success of your geotextile installation. Start by marking the area where you’ll install the fabric. Remove all vegetation, rocks, and debris from the surface.
The ground needs to be relatively level and compact. Small bumps and holes will create weak spots where the fabric might tear. Use a rake to smooth the surface and fill any depressions with sand or fine soil.
Check the drainage patterns in your area. Water should flow away from structures and toward appropriate drainage outlets. If you’re installing fabric for filtration purposes, make sure the slope directs water to the intended collection point.
Compact the soil using a hand tamper or plate compactor. This step prevents settling that could cause the fabric to sag or tear later. The surface should feel firm when you walk on it.
Measuring and Cutting Fabric to Size
Accurate measurements prevent waste and ensure proper coverage. Measure the length and width of your installation area twice to confirm accuracy. Add 6-12 inches to each dimension for overlaps and edge securing.
Roll out the fabric on a clean, flat surface for cutting. Use a sharp utility knife or heavy-duty scissors to cut straight lines. Mark your cutting lines with chalk or a marker before cutting to ensure accuracy.
For large areas, you’ll need multiple pieces of fabric. Plan your layout to minimize the number of seams. Seams create potential weak points, so fewer is better. The fabric should run perpendicular to the direction of heaviest traffic or water flow.
Cut pieces slightly larger than needed rather than too small. You can always trim excess fabric, but you can’t add material back once it’s cut short. Keep cut edges straight and clean to ensure proper overlapping.
Proper Fabric Laying Techniques
Start laying fabric at the highest point of your installation area. This allows water to flow naturally over the seams rather than pooling behind them. Unroll the fabric carefully to avoid wrinkles and air pockets.
The fabric should lay flat against the ground without being stretched tight. Slight looseness is better than tension, which can cause tearing under load. Smooth out any wrinkles or folds as you go.
Laying Steps:
- Position the first piece at the starting point
- Unroll slowly, checking for proper alignment
- Smooth the fabric by hand, working from center outward
- Ensure the fabric follows ground contours naturally
- Trim excess material at edges
For vegetation applications, the fabric needs to conform closely to the soil surface. This contact is crucial for proper root establishment and erosion control.
Securing and Overlapping Methods
Proper securing keeps the fabric in place during installation and use. Start by securing the corners and edges with landscape pins or staples. Space fasteners every 3-4 feet along the perimeter.
Overlap adjacent pieces by at least 6 inches, or 12 inches in high-stress areas. The upstream piece should overlap the downstream piece to prevent water from getting underneath. This arrangement is critical for drainage and filtration applications.
Securing Options:
- Landscape pins: Best for permanent installations
- Staples: Good for temporary or light-duty use
- Weighted edges: Suitable for some drainage applications
- Soil cover: Provides natural securing
Professional geotextile mattress projects often use mechanical fasteners or concrete anchors for high-stress applications. Residential projects typically work fine with standard landscape pins.
Check that overlaps are secure and won’t separate under normal use. The fabric should feel stable when you walk on it or apply normal pressure.
Quality Control and Inspection
Inspect your installation before covering the fabric with soil or aggregate. Look for tears, loose areas, or inadequate overlaps. Fix any problems now rather than after the project is complete.
Walk the entire installation area to check for soft spots or areas where the fabric doesn’t lay flat. These issues indicate poor ground preparation that needs correction. The fabric should feel uniformly supported across the entire area.
Inspection Checklist:
- All edges properly secured
- Overlaps meet minimum requirements
- No visible tears or damage
- Fabric follows ground contours
- Drainage flows in correct direction
- All pins or fasteners properly installed
Document your installation with photos, especially around critical areas like drainage outlets or structural connections. This documentation helps with future maintenance and warranty claims.
Contact geotextile specialists if you discover problems that you can’t fix yourself. Professional assessment can prevent costly failures later.
Maintenance and Long-term Care
Regular maintenance extends the life of your geotextile installation. Most fabric systems need minimal care, but periodic inspection catches problems early.
Check the installation annually for signs of damage, displacement, or clogging. Look for areas where the fabric has shifted or where drainage seems slow. These issues often indicate maintenance needs.
Maintenance Tasks:
- Remove accumulated debris
- Check and tighten loose fasteners
- Inspect for tears or damage
- Verify proper drainage function
- Monitor vegetation growth (if applicable)
Professional systems like specialized geotextile protection may require more frequent inspection, especially in high-stress environments. However, residential installations typically need attention only when problems become visible.
Replace damaged sections promptly to prevent larger failures. Small repairs are much cheaper than full system replacement. Keep some extra fabric on hand for patches and repairs.
Common Installation Problems and Solutions
Even experienced installers encounter challenges during geotextile installation. Understanding common problems helps you avoid them or fix them quickly.
Problem: Fabric tears during installation
Solution: Use sharper cutting tools, avoid dragging fabric over rough surfaces, choose heavier-duty fabric for demanding applications
Problem: Poor drainage after installation
Solution: Check for clogged fabric, verify correct slope, ensure proper overlap direction
Problem: Fabric shifts or moves
Solution: Add more fasteners, improve ground preparation, use heavier fabric
Problem: Weeds growing through fabric
Solution: Check for tears, ensure adequate overlap, consider thicker fabric
Learning from proven geotextile projects helps avoid common mistakes. Each project type has specific requirements that affect installation methods and material choices.
The most common mistake is rushing the ground preparation phase. Taking extra time to properly prepare the surface prevents most installation problems. Good preparation makes the actual fabric installation much easier and more successful.
Frequently Asked Questions
Q: How long does geotextile fabric last?
A: Quality geotextile fabric typically lasts 15-25 years in most applications. The lifespan depends on fabric type, installation quality, and environmental conditions. UV-resistant fabrics last longer in exposed applications.
Q: Can I install geotextile fabric myself?
A: Yes, most residential projects are suitable for DIY installation. However, large or complex projects may require professional expertise. Consider hiring professionals for slopes, waterways, or structural applications.
Q: What’s the difference between woven and non-woven geotextile?
A: Woven fabrics offer higher strength and are better for separation applications. Non-woven fabrics provide better filtration and drainage. Choose based on your primary application needs.
Q: How much overlap is needed between fabric pieces?
A: Minimum overlap is 6 inches, but 12 inches is recommended for high-stress areas. The overlap direction should allow water to flow over the seam rather than underneath it.
Q: Can geotextile fabric be used under concrete?
A: Yes, geotextile fabric works well under concrete for separation and drainage. However, use woven fabric for better strength and puncture resistance under heavy loads.
Q: What happens if the fabric gets damaged?
A: Small tears can be patched with fabric and adhesive. Larger damage may require section replacement. Regular inspection helps catch problems before they become serious.
Q: Is special equipment needed for installation?
A: Basic hand tools work for most residential projects. Professional installations may use specialized equipment like fabric dispensers and mechanical fasteners for efficiency and quality.